Domain Rules
The Domain Rules page is the nerve center of the extension. A rule describes, for a domain: its label, its grouping mode, its deduplication mode, its category. Grouping and deduplication only fire on domains covered by a rule.
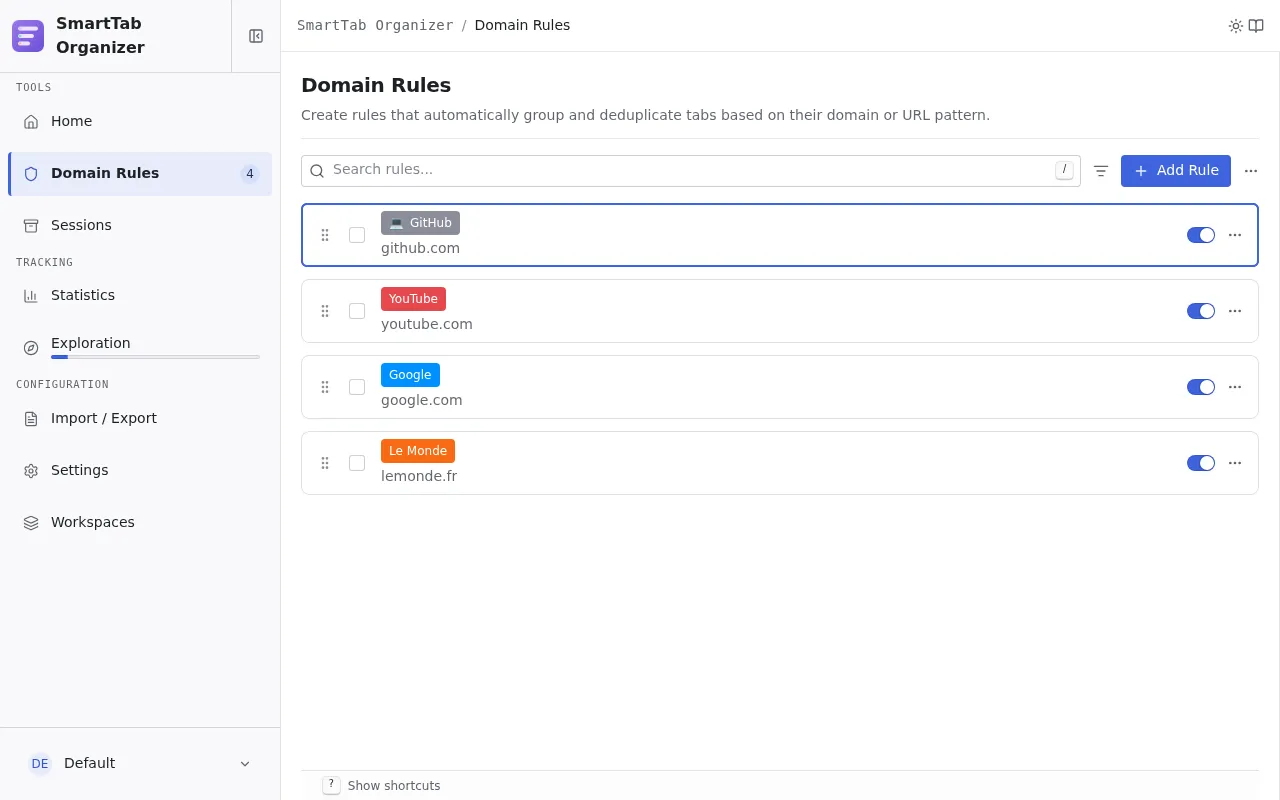
The list
Section titled “The list”Each row covers a domain and shows its label, its configuration mode (preset, manual, ask, fallback label), its category (emoji + label), its group color, and its state. Three main actions from the list:
- Reorder via drag and drop to adjust priority (the first applicable rule wins in case of overlap).
- Enable or disable a rule individually with its toggle, without deleting it.
- Open the wizard to edit an existing rule or create a new one.
A search bar filters the list by rule name or domain. Multi-selection lets you run bulk actions: enable, disable, delete, export.
Filter, sort and group the list
Section titled “Filter, sort and group the list”Next to the search box, a view button opens a menu to rearrange how the list is displayed. It only affects presentation: it changes neither the rules nor their evaluation priority (which stays the manual order).
| Setting | Options |
|---|---|
| Sort | Manual order (drag and drop), by date, by category, by color, or by domain (groups rules sharing the same root domain). Ascending or descending. |
| Filter | By color (the nine colors or “no color”), by category (or “no category”), by state (enabled or disabled). |
| Grouping | None, by category, by color, or by state. |
When a grouping is active, each section gets a collapsible header with a tri-state checkbox to select every rule in the group at once. The chosen view (sort, filter, grouping) is remembered separately for each workspace.
Enable grouping globally
Section titled “Enable grouping globally”Grouping is on by default for every domain. You can turn it off for the whole extension from the Settings page, independently of the per-rule grouping switch.
Create a rule
Section titled “Create a rule”Click Add Rule at the top of the list. The wizard opens in four steps.
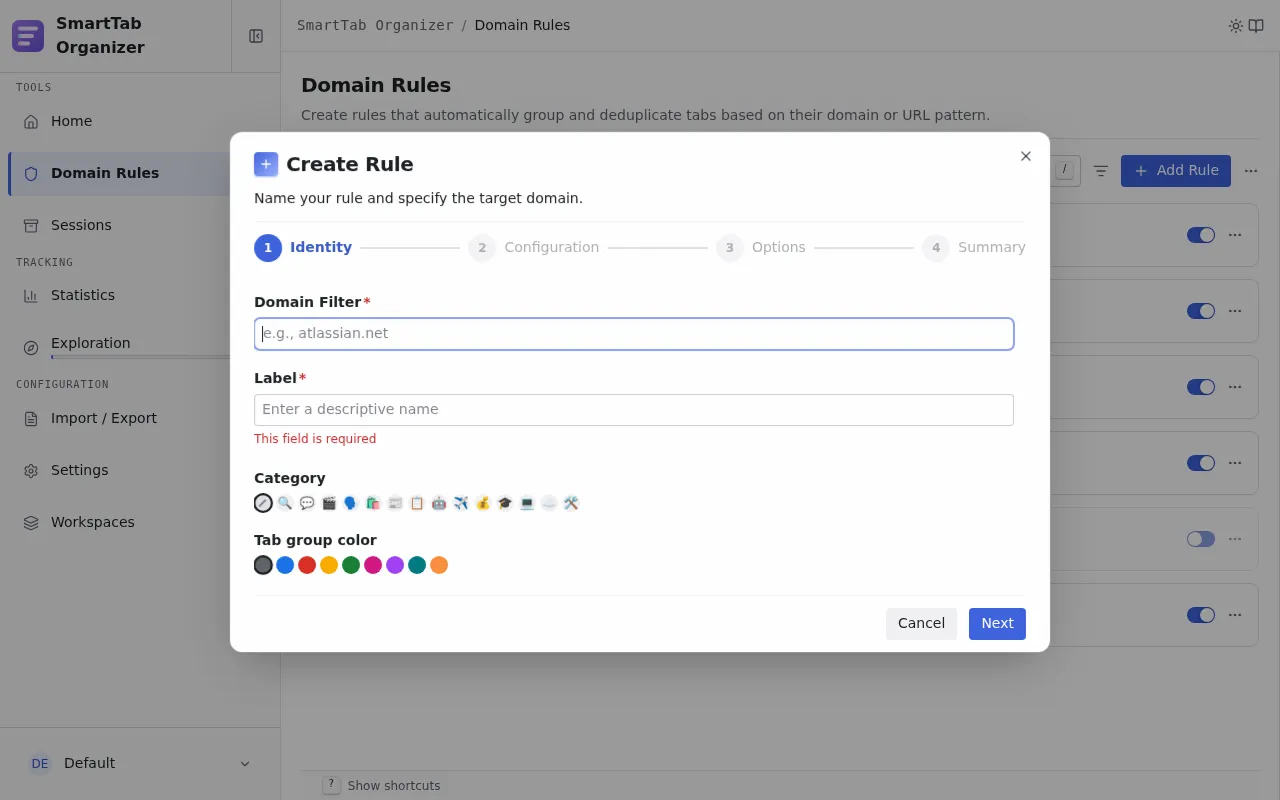
Step 1: Identity
Section titled “Step 1: Identity”- Domain Filter: the domain pattern covered (for example
github.com,*.atlassian.net). Leave empty for a cross-domain rule. Instead of typing it from memory, you can seed it from your open tabs. - Label: the rule’s identification name in the list. It is not used as a default group name (see the Group Name field of the Fallback Label mode for that).
- Category: pick from the 14 built-in categories (see Categories and packs). The category only provides the emoji and the label. It does not affect the color.
- Tab group color: a field distinct from the category. Pick from the nine native Chrome group colors (
grey,blue,red,yellow,green,pink,purple,cyan,orange).
Step 2: Configuration
Section titled “Step 2: Configuration”Four configuration modes are offered via a radio selector:
| Mode | When to use |
|---|---|
| Preset | The current site is already covered by a regex preset. The preset automatically wires the naming mode and the title / URL regexes. |
| Ask | The extension prompts you for the group name on each creation. Handy for sites where you want to name the context on the fly. |
| Manual | You write the regexes yourself and pick the mode among the “Smart / Title / URL” variants. Useful for an internal site or a case not covered by a preset. |
| Fallback Label | No regex, no extraction. Unlocks a Group Name field where you type the literal group name. That name also serves as the safety net of the Smart + Label mode. |
For the full breakdown of the eight naming modes and their fallback chains, see Group tabs.
Step 3: Options
Section titled “Step 3: Options”Configures deduplication for this rule: enabled toggle, Deduplication Mode (Exact URL, URL without ignored params, URL Includes) and, when applicable, the list of parameters to ignore. See Deduplicate for details.
You can leave deduplication off if you only need grouping on this domain.
Step 4: Summary
Section titled “Step 4: Summary”A confirmation page summarizes the rule before saving. You can return to previous steps via the arrows or the stepper at the top of the wizard.
Seed the domain filter from open tabs
Section titled “Seed the domain filter from open tabs”Next to the Domain Filter field in step 1 sits an Import from open tabs button. It opens a panel listing the domains found across your open tabs (all windows, http and https only), so you can fill the field from a real browsing context instead of from memory. The panel is a discovery view: its only action is to seed the field. It never creates a rule, installs a pack, or changes presets.
- Activate Import from open tabs next to the domain field. A dialog opens with a search box and a scrollable list.
- Each row shows a host, the number of open tabs on it, and, when the host is already covered by an enabled rule, an Already managed by a rule badge. Hosts not yet covered appear first, then by tab count descending.
- Pick a host. When it has a subdomain, a short choice lets you seed either the registrable domain (for example
github.com, the default) or the full host (for examplegist.github.com). - Confirm. The chosen value fills the domain filter and the panel closes.
The search box filters the list as you type. When no readable tab is open outside the extension pages, the panel shows an empty message. Duplicate tabs on the same host are merged into a single row with the combined count.
Edit a rule
Section titled “Edit a rule”Click the Edit icon on a row (or press E when the row is focused). The same wizard opens, prefilled. The change is applied immediately on save, without extra confirmation.
Disable, delete
Section titled “Disable, delete”| Action | Effect |
|---|---|
| ON/OFF toggle | Disables the rule without deleting it. The row is greyed out but stays in place. Useful to pause a rule. |
| Delete | Removes the rule. A confirmation is requested. Multi-selection lets you delete several rules in one action. |
Domain overlap
Section titled “Domain overlap”When several rules cover the same domain (for example *.atlassian.net and mycompany.atlassian.net), a small rank badge appears next to each rule involved. The number is the rule’s position in the evaluation order for that domain. No badge appears when a domain is covered by a single rule.
Hover the badge to open a HoverCard listing every rule covering the domain, in order, with the current one in bold. The rules are evaluated in this order, and the first one that can actually apply (grouping enabled and a group name produced) wins. You can reorder them via drag and drop. An overlap can be intentional: a generic rule as a fallback with more specific rules above it.
Import a collection of rules
Section titled “Import a collection of rules”To add several rules at once rather than creating them one by one, import a pack. See Categories and packs for the gallery of 49 built-in packs and the import flow.